Channel Setup Part 2 ---- Create Organizational Hierarchy in D365 F&O
To create an organizational hierarchy, follow these steps.
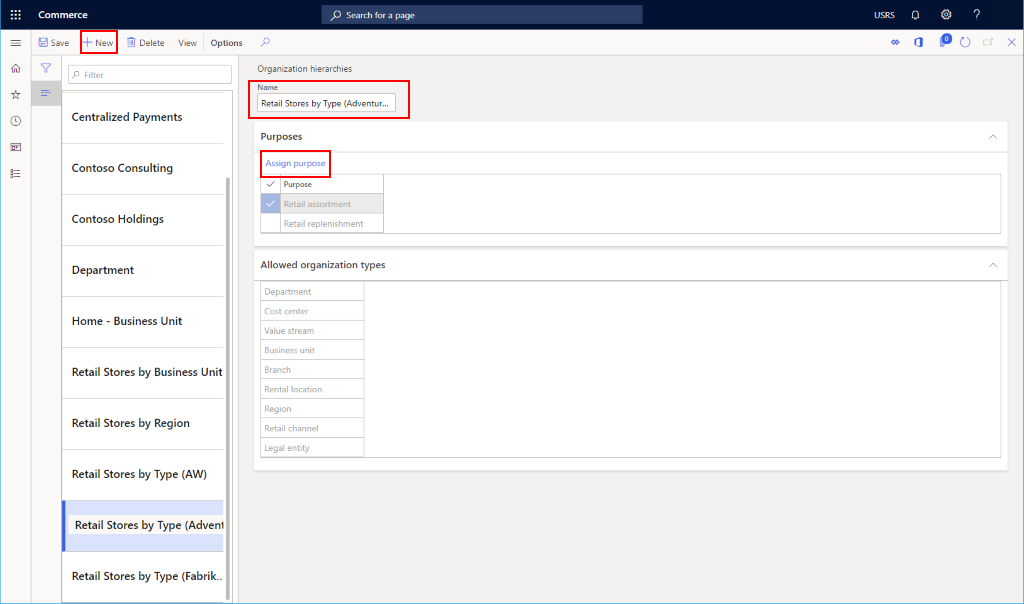
- In the navigation pane, go to Modules > Organization administration > Organizations > Organization hierarchies.
- On the action pane, select New.
- In the Name field, enter a value.
- In the Purpose section, select Assign purpose.
- In the list, find and select the desired record. Select a purpose to assign to your organization hierarchy.
- In the Assigned hierarchies section, select Add.
- In the list, mark the selected row. Find the hierarchy you just created.
- Select OK.
The following image shows an example organizational hierarchy created for a fictitious "Adventure Works" set of stores.

Add organizations to a hierarchy
To add organizations to a hierarchy, follow these steps.
- In the list, find and select the desired record. Select your hierarchy.
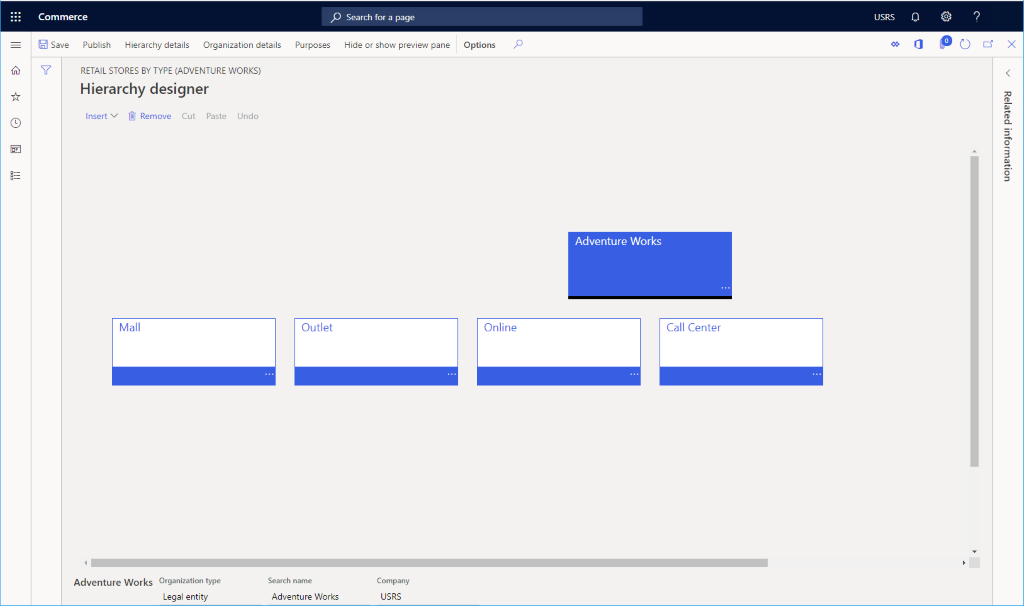
- On the action pane, select View.
- Add organizations, as necessary.
- To add an organization, select Edit and then select Insert. When you are done making changes you can save a draft and publish the changes.
The following image shows a legal entity added at the hierarchy root with four cost centers added for "Mall", "Outlet", "Online" and "Call Center" channels. Various retail, call center, and online channels can then be added to each.


Comments